How to Use a Sketchbook


Learn how to use a sketchbook and the various purposes of a sketchbook in this post. There are many ways to use a sketchbook and I want to share how I use a sketchbook as an artist. To learn how to use a sketchbook, keep reading! 


How to Use a Sketchbook

There are a number of ways to use a sketchbook. A sketchbook can hold many different purposes for an artist. Here are some of the ways a sketchbook can be used below! 


As a Journal 

You can use a sketchbook as a journal by recording ideas, notes, thoughts, plans etc. This is often how I use a sketchbook in my art practice so that I don’t forget ideas. 


As a Logbook

You can record dates and times you worked on a project to keep track of the hours you worked. You can treat your sketchbook as a scientist and record findings of what worked, what didn’t work and what you want to try next time. For example, you can keep track of colours of paint and ratios you used to mix a specific colour of paint for a painting. You could also record how long something took to dry or about an installation that didn’t go well and what you might do differently next time.  


As a Place to Brainstorm

You can use your sketchbook as a place to brainstorm ideas by making lists or mind maps to come up with ideas of what to create, what materials to use or what the title of an artwork should be. I often use my sketchbook in this way. 


As a Place to Plan

I will also use my sketchbook to create small thumbnail rough sketches of ideas for a final piece or how a project might be displayed. Often I will plan out a couple of ideas to see what I prefer in case something doesn’t turn out as planned. 


As a Place to Experiment 

You can use the pages of your sketchbook as a place to experiment and test out new ideas, materials or techniques. You could even label or record your different tests, so you remember what you did in the future. 


As a Place to Practice 

You can use it to practice drawing, composition, ideas, installation plans etc. 


A Place for Sketching/Drawing 

You can use it to practice sketching or drawing by drawing daily. You can carry your sketchbook with you in a bag to sketch what you see while you are waiting in a doctor’s office or waiting for the bus. You can draw what you see outside when you stop in the park during a walk. Or you can follow drawing prompts to help keep yourself inspired while practicing your drawing. 


A Place for Painting or Mixed Media 

Just like how you practice drawing or sketching you can practice painting or mixed media. There are sketchbooks you can buy specifically for painting or mixed media that have thicker paper and are able to hold paint or liquids without warping or wrecking the paper. 


As a Place for Research

You can record research, notes, inspiration, artists and artwork you admire etc. If your artwork is on a specific theme you might want to research that topic to inspire other ideas or to plan the title of the artwork.


These are some of the ways to use a sketchbook. As you can see you might choose multiple ways for how to use a sketchbook. There is no right or wrong way, you get to decide! 


Ways to Use Your Sketchbook More

To keep you inspired and use your sketchbook more, try to keep it in a place where you can see it daily or have multiple sketchbooks like one by your bed, one in the studio and one in your bag. 


You can also try my drawing prompts to keep you inspired and to practice your drawing skills. Click here to check them out! 


Related Articles:

How to Use Layers in a Sketchbook

Drawing Prompts for High School 

Art Journal Inspiration

How to Make Time for Art

Click here to download my FREE guide with 10 tips for creating your art portfolio for school applications!


What Does Canva Pro Do?

What does Canva Pro do? What are some of the benefits of Canva Pro versus the free-trial? There is a lot that Canva Pro can do. If you want to learn more about what does Canva Pro do, keep reading.


What Does Canva Pro Do?

what does canva pro do


Canva Pro Benefits 

  • Has more storage of designs 

  • Has more design elements to choose from

  • Able to organize in unlimited folders

  • More design templates to choose from

  • Able to add brand colours and logos easily

  • Resize designs 

  • Background remover in photos

  • Social media scheduler

  • More customer support 


What I Use Canva Pro For as an Artist

Here are some of the ways I use Canva Pro as an artist most commonly in my business:

  • Make Pinterest pins

  • Social media posts for sales 

  • Email freebies 

  • Facebook posts 

  • YouTube covers 

  • Digital products to sell

  • List of art materials for workshops 

  • Graphics for ads

  • Certificates of authenticity for artwork

  • Staging artwork in photographs 


What I Like About Canva Pro as an Artist

The following are Canva Pro features that I use most frequently in my Canva designs as an artist.


Organization with Unlimited Folders

Once you begin to use Canva Pro you will begin to see all the uses you can use it for. It is handy to be able to organize your designs in different categories like a folder just for Instagram posts, so that you can easily find your designs. 


Background Remover 

I like the feature of the background remover. You can literally press one button and it will remove the background. This can be handy to make your designs look more interesting and professional! 


Brand Colours and Logo

With the brand kit feature you can easily add in your logo on your designs and change colours in a template or a design with just one click. By setting up your brand colours you will have a consistent and professional look to all the designs you create! 

Resizing Designs

If you create an instagram post design you can click the resize button and easily size it to a Facebook post, Instagram story post etc. 


As you can see Canva Pro has a lot of great perks for a very affordable price. To try Canva Pro for free for 30 days you can click on the button below.

what does canva pro do


Canada Artist Grant 


I received a Canada artist grant with th Ontario Arts Council last year and worked on a project that Canada artist grant. I was awarded a grant of $2000 for emerging artists to learn a new skill or for professional development including the purchase of new art supplies. You can learn more about this Canada artist grant in this post!


Canada artist grant/OAC artist grant proposal

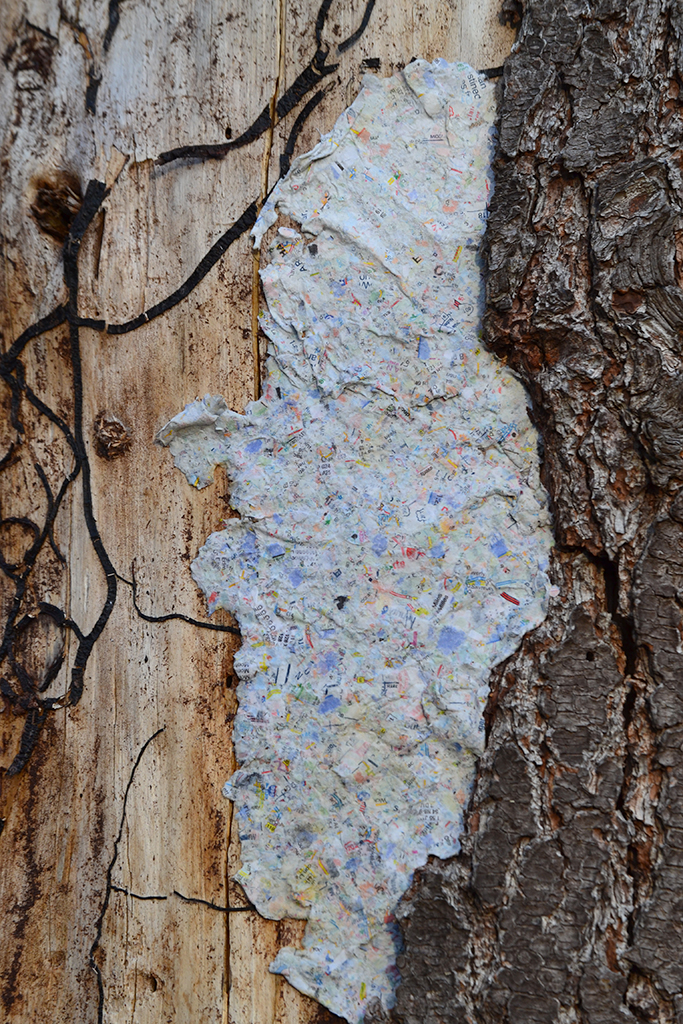
For my Canada artist grant I chose to focus on papermaking in my application. I proposed learning how to make paper out of plants and learning how to use the letterpress machine. I wanted to letterpress some of my Patched poems on handmade pieces of map paper I made. I also proposed to purchase some mould and deckles to help me with papermaking some abaca and cotton pulp, a vat and other paper making supplies. 


Canada artist grant/OAC artist grant 

I chose to work with a local paper making company the Papertrail to be able to learn about paper making easier. The Papertrail is based out of New Dundee, Ontario. That’s also where I attended workshops, completed my letterpress poetry project and ordered my papermaking supplies. 


I attended 5 paper making workshops in total with the grant money. A basic beginner paper making workshop, two workshops on making paper with plants and two on using the letterpress. 

Canada artist grant


About the Paper making Workshops 


The Beginner Papermaking Workshop 

This workshop took place in August of 2022 and in this workshop I learned basic skills and refined my paper making skills. We also learned how to use pigments in paper and got to experiment with the sheets of paper we made. 


Letterpress Workshop #1 

I did this workshop in November, during this workshop I learned how to use the letterpress and the history of the letterpress. I also did some test prints of some text with the letterpress. 

canada artist grant with paper making


Paper Making with Plants Workshop

This workshop was a two day back to back workshop in December. In these workshops I learned how to make paper from plants. I made paper from the stems and pods of milkweed as well as from flax. I got to use their hollander beater and beat the pulp by hand. 


Letterpress Workshop #2 

This workshop happened in December. I got to complete my Patched poem project and letterpress 5 different poems I wrote onto handmade map paper. 


All of these workshops were full day workshops. I am grateful for the Canada artist grant with OAC and being able to develop my paper making skills as an artist as well as being able to complete a project and purchase new paper making supplies.  


You can purchase my book Patched that has more poems here!


Related Articles:

How to make paper out of denim

Microgrant with cyanotypes

OAC grants

Patched Book


How are Paper Made with Plants 


How are paper made with plants? Paper can be made with natural fibres whether it is plants or a material that comes from plants like 100% cotton fabric. Learn how are paper made with plants below!


How are paper made with plants - the process 

When making paper with plants the fibres of the plants need to be weakened. Naturally a plant has strong fibres and has a lot of strength. 

how are paper made with plants

The paper above is made with milkweed seeds as part of my OAC grant in 2022.

How are paper made with plants 

How are paper made with plants - Harvesting

There are a lot of books and online resources to explain how to make paper with plants. First of all, you need to decide what plants you want to use to make paper. You can begin by harvesting or collecting those plants. Different parts of the plant will make different kinds of paper like different types of plants will make different types of paper. 


For example, you can make paper with leaves, stems, seeds, or buds/flowers of the plant and they will all form different types of paper. 

The paper above is made with flax as part of my OAC grant in 2022.

It’s always good to collect lots of plants. You want to collect at least ¾ of a pound of that same part of the plant. You don’t want to mix different parts of the plant together because they are all going to take different times to weaken. For instance, a stem is stronger than a leaf so it is going to take longer for that fibre to weaken so it will be soft enough to make a sheet of paper. 


How are paper made with plants - Cooking

Next you will want to begin researching to determine how long you will want to cook/boil the plant so that you can weaken the plant fibres. You will need a large pot and you will want to use a different pot then the one you use to cook your meals. You can find lots of large pots at the thrift store.


You will also need a long spoon to stir the plant. You can keep checking it every 20-30 minutes to see if the plant is getting softer. You want the plant to begin to break apart. 

The paper above is made with stems from milkweed as part of my OAC grant in 2022.

How are paper made with plants - Blending/Beating the Pulp

After the plant has been cooking and is soft you can transfer the mixture to be able to blend it or beat the pulp. Certain pulp could be mixed in a blender, a hollander beater or with a Jiffy Mixer. Some pulp-like stems that are a bit tougher or woody could be beaten with a hand paddle to create the pulp. You want to mix/blend/chop the pulp into small pieces so that they can come together like puzzle pieces when you form your sheet of paper. 


How are paper made with plants - Forming the Sheet

Once you have your plant pulp ready to go you can pour it into a vat which is a large container of water. You will also need a mould and deckle to make your paper. Begin pouring in about 250mL of the pulp into your vat. Stir the pulp so that it floats and doesn’t settle at the bottom of the vat. Scoop your mould and deckle by skimming the surface of the water and collecting the pulp. You will have to practice with this.


Then remove the frame and press the pulp off the screen and onto some sheets of felt. Separate each sheet of paper with a sheet of felt and repeat the process. 


How are paper made with plants - Pressing and Drying

Once you have your stack of papers you will need to press the water out of the pages. You can use a paper press or squeeze the water out with pressure. 


You can then place the paper in a drying rack by carefully peeling the paper off the felt. The paper will need to dry for 24 hours.


Now you know how are paper made with plants and you can begin harvesting and experiments with different types of plants to make your own paper! 


You can see more of my handmade paper here!

Related Articles:

How to Make Paper Out of Denim

Paper Art Installation

Shop Handmade Paper

OAC Grant for Paper Making


OAC Grants


Early this year I was given one of the OAC grants for emerging artists. This OAC grant is a $2000 grant that gives funding to purchase art supplies and to participate in educational skill development. 


I started applying for OAC grants this past fall and I was excited to have received one. OAC stands for Ontario Arts Council. The OAC grants are a lengthy process to set up an account and submit your application online but they are worth it. 


By receiving OAC grants or other grants, artists can receive funding to make projects possible. $2000 is a lot of money and I am grateful to have received this grant as this project would not be financially possible without it. 


There are many different OAC grants available. You can learn more by clicking here!


It’s important to note that OAC grants are only for residents in Ontario. However, depending on where you live, the province or state, try Googling grants with your location to find other grants to apply to. 


handmade map paper part of oac grants

OAC Grants- the OAC Grant Proposal

I will be using the money from the OAC grant to purchase paper making supplies including different types of pulp, mould and deckles and other paper making supplies. I will also be registering for some paper making and letterpress classes to be able to enhance my skills as a paper maker. Lastly, I will use some of the money to rent out a paper making studio place near where I live. I have until 2023 to complete this project. I started purchasing supplies and signing up for workshops this summer of 2022. 


I plan on making sheets of map paper using recycled maps and using the letter press to write some of my poems on the paper. I also want to make more large sheets of the map paper to be able to do large installations of my work Patched. You can read more about the Patched project here! 

Jackie Partridge Patched Project

Jackie Partridge, Patched Project


If you are interested in applying to OAC grants you can click here to check their deadlines. 

I appreciate the financial support of OAC grants for funding my art practice! 


To find out more about the project check out my instagram @jackiepartridge_    and search the #patchedproject


Related Articles: 

10 Lessons I Learned in Art School

How to Get an Artist Grant

OAC Website 

OAC Grant Deadlines 

Patched Project


Art Journal Inspo


How do you keep track of your art inspiration? I record my inspiration in an art journal or sketchbook. I like looking back at my art journal inspo over the years to see all of the ideas I have had. Some are ideas I have completed and some are still ideas I wish to complete. Art journal inspo tracking is a great way to organize your thoughts and keep track of your brilliant ideas. I like to completely fill an art journal and then I will move onto a new sketchbook to fill. 

So, you might be asking yourself -what do you record as art journal inspo? Keep reading and I will let you know! 


Art Journal Inspo Ideas

1. Sketches

As your art journal inspo you get to decide what you want to fill your sketchbook with. But an obvious choice is sketching. You can complete daily drawings, weekly drawings, doodles, quick sketches or gestural drawings. There are no rules for a sketchbook. You can use any material, any style or technique. You can decide if you want to spend 5 minutes or 5 hours on a page. Which makes working in an art journal very freeing and exciting because you are in control. 


In my own sketchbook, the sketches are not detailed and sometimes are just an outline with some words. As long as I know what it means that’s all that matters for me. Your approach can be different and that is completely up to you. It is your art journal inspo. 

art journal inspo


2. Titles, Words or Poetry 

Sometimes, I am reading something, watching something or listening to something and I hear a word that inspires an artwork. I keep my art journal by bed and write down the words that come to mind. My artwork is often very poetic and some art like my series Patched, involve poetry. Anytime, I am inspired by words or phrases I will write the poem or title for an artwork in my art journal to refer to later. 


3. Installation methods 

With my artwork, I like to test out new installation methods in my art journal by seeing what they will look like on paper. Again, I usually start with a simple sketch and add some written notes. I like to test suspending an artwork, presenting an artwork on a plinth, hanging the artwork on a wall and any other ideas I have in my art journal. 


4. Art to sell

If I have an idea for an artwork to sell I also record that in my art journal as inspiration. Then when I am feeling inspired and creative, I can come back and create that artwork. When I sell art, I create a series. I will use the pages of my art journal to sketch out and plan the series and make note of any colours or ideas I want to try in this series. 


5. Techniques and experiments 

An art journal is a great place to record techniques and experiment with new materials. You can use your art journal inspo to log new techniques you have tried and to make note of what works and what doesn’t. It’s nice to use your art journal as a place to practice where it is okay to make mistakes. A sketchbook is a great place to learn and to practice trial and error. Not everything you create will be wonderful. That is part of the process! 


Click here to download my FREE guide if you are thinking of applying to an art school or arts-based program!

Related Articles:

Why I became an artist

Drawing Prompts for High School

10 Skills to Become a Better Artist


For more tips please click one of the icons below to follow me on social media!


What it’s Like to Be Vermont Studio Center Alumni

Being a Vermont Studio Center Alumni is a part of joining an online community. I attended the Vermont Studio Center art residency in Johnson, Vermont in November, 2017. I stayed at the artist residency for two weeks. I follow them on instagram and I am a part of a private Facebook group similar to the Women’s Studio Workshop residency -which you can read about here! Vermont Studio Center Alumni have been recognized for tons of achievements as the Vermont Studio Center is a top residency known globally.

Vermont Studio Center in Johnson, Vermont

Vermont Studio Center in Johnson, Vermont

Although I am grateful for the experience at Vermont Studio Center and to be a Vermont Studio Center Alumni I don’t think I would go back to this artist residency. As an artist, I like to travel to new places to see how place impacts my work. Vermont Studio Center is a more pricey artist residency as the fee does include your food. Since I am a paper maker the Vermont Studio Center is less appealing as they do not have a paper making studio.

For anyone who has not been or is needing a quiet space to work I would recommend this residency as I was very productive and got a lot done. Everyone is friendly and there are options to sing karaoke or enjoy a campfire while you are there too! 

While I was there, I worked on some projects for my thesis exhibition that happened in February, 2018 at Concordia University. I had a large studio with a window and a couple of tables. I worked on pieces that later became projects in my exhibition including:


What I Worked on at Vermont Studio Center

Piled Up installation tested out at the Vermont Studio Center

Piled Up installation tested out at the Vermont Studio Center

While being at the Vermont Studio Center residency I worked on altering books for my project What is and What Was. I used the leftover cut-outs to make Piled Up. I tested out the installation for Piled Up on a shelf that was in my studio. I later built a shelf for my exhibition display in my thesis show at Concordia University. 

With my series Patched that is still an ongoing series I arranged photographs of Patched into patched quilt formations. After the residency, I sewed them on my sewing machine. I worked with plaster casts of leaves during my Vermont Studio Center residency. I took advantage of the beautiful scenery in Vermont (it is very easy to be inspired) and I took more photos for my series Patched. 

I enjoyed having a lot of wall space so that I could test out Precariously Perched. In this piece I balance twisted thin strands of maps on straight pins and nails. You can see more of Precariously Perched here! 

Accommodations at Vermont Studio Center

I stayed in a room by myself and had a shared bathroom. There was a few other people living in the house I was staying at. I had a separate key to my bedroom so I felt very secure while living there. At the residency all of your meals are provided in the dining hall. The food is really good and there are a lot of options. All of the food is made by the chef. Having your meals provided is nice during an artist residency because then you don’t lose time cooking, getting groceries or doing dishes and you can have more time devoted to making art. 

Again, I don’t think I would go back to this artist residency although I am grateful for the experience at Vermont Studio Center and to be a Vermont Studio Center Alumni. Experiencing new places to make art is important for me and having access to materials like a paper making studio is also extremely important.

Winter view out my studio window at the Vermont Studio Center

Winter view out my studio window at the Vermont Studio Center

With that being said Vermont Studio Center is a great relaxing and quiet place to work. The beauty of Vermont is incredible and I had such a productive two weeks! 

Patched installation I worked at while at the Vermont Studio Center

Patched installation I worked at while at the Vermont Studio Center

Patched installation for my thesis exhibition at Concordia University inspired by being at the Vermont Studio Center

Patched installation for my thesis exhibition at Concordia University inspired by being at the Vermont Studio Center

How to Become a Vermont Studio Center Alumni

Here is more information about how to apply to Vermont Studio Center so you can become a Vermont Studio Center Alumni - one day too! 

https://vermontstudiocenter.org 

https://vermontstudiocenter.org/residenciesinfo 

Precariously Perched installation tested out at the Vermont Studio Center

Precariously Perched installation tested out at the Vermont Studio Center

Related Articles 

Women’s Studio Workshop -artist residency

If you are mom you can check out this motherhood residency: http://www.artistresidencyinmotherhood.com/how-it-started 

Here is another great website to help you find the right artist residency for you! https://resartis.org/covid-19-updates/


Stay connected with me by following along on social media -click on one of the icons below!

Precariously Perched installation part of my thesis exhibition at Concordia University inspired by my work at Vermont Studio Center

Precariously Perched installation part of my thesis exhibition at Concordia University inspired by my work at Vermont Studio Center

All About the Women’s Studio Workshop in NY

In March 2018, I attended the Women's Studio Workshop Residency in NY. (The small town of Rosendale to be exact).  I stayed for 5 weeks at the Women’s Studio Workshop. I got to experience part of the winter and part of the spring at the Women’s Studio Workshop. The Women’s Studio Workshop in NY was founded in 1974. I was in the paper making studio at the Women’s Studio Workshop in NY.

Coming from a small town, I really enjoyed the small community of Rosendale. I felt very safe and welcomed while at the residency, in town or on the Rail Trail nearby.  Read more to figure out if attending the Women’s Studio Workshop in NY as your next artist residency is right for you!

About Women’s Studio Workshop in NY

Women’s Studio Workshop in NY was founded in 1974 by Ann Kalmbach, Tatana Kellner, Anita Wetzel, and Barbara Leoff Burge. Their goals were to develop a studio workspace for artists to create new work and collaborate. Programs were centered on the artistic process. The first studios were in a two-story single-family home. Etching was in the living room, paper making was in the attic, and screen printing was in the basement.

This passage is from their website - To read more- click here


The Rail Trail at the Women’s Studio Workshop

I was working in the paper making studio while I was there. I really enjoyed hiking in the area, especially on the Rail Trail. While on the Rail Trail I did numerous Patched installations using my handmade map paper. The Rail Trail is very close to the residency and is a great source of inspiration to artists there including myself! 

Patched is an ongoing installation since 2017 by artist Jackie Partridge that uses handmade map paper pulp on trees where the bark has naturally peeled away.

Patched is an ongoing installation since 2017 by artist Jackie Partridge that uses handmade map paper pulp on trees where the bark has naturally peeled away.

At the Women’s Studio Workshop residency when I was there I made a lot of paper working with maps and blue jeans. I took advantage of the hollander beater and worked on my piece Sediment. You can learn more about the project here! 


I got to try the vacuum table for the first time which was very exciting for my practice. I worked on creating large sheets of map paper on the vacuum table which I used in my Patched video. See the installation of this large sheet of handmade map paper below:

Highlights of the Women’s Studio Workshop in NY

I loved the Women’s Studio Workshop because the staff are very helpful and kind whether it is showing you how to use equipment or giving you a ride into to town to get groceries. I liked how every lunch we had a potluck so we could really get to know one another.

What I Love About Artist Residencies

I am always highly focused and productive while on an artist residency. It is nice to be in a new place and see how that relationship directly impacts my work. Since my work is directly related to the land and environment there is always new inspiration, ideas, and projects when I am in a new place. This is always exciting for me! Residencies give you time, space and materials to explore and practice with. New ideas always form when I am away from home!

What I Did at the Women’s Studio Workshop in NY

  • I had an opportunity to present my art in an artist talk while I was there to people at the residency and locals in the Rosendale area

  • I submitted a piece of art I made as part of their alumni collection

  • I met other artists and learned new techniques like the vacuum table

  • I explored the local scene and enjoyed the Rail Trail 

Patched installation made on the Rail Trail at the Women’s Studio Workshop in NY

Patched installation made on the Rail Trail at the Women’s Studio Workshop in NY

Accommodations at the Women’s Studio Workshop

I stayed with another person and we shared a bathroom and kitchen but had separate bedrooms. Bedding was included. Kitchen utensils and equipment were included. The price for the residency is highly affordable and their are options for grants from the residency or to apply for funding externally. 

I would definitely go back to this artist residency again! 


How You Can Go to the Women’s Studio Workshop in NY

Check out their calendar on dates of when you can apply to their upcoming programs and classes! https://wsworkshop.org/opportunity-calendar/


I would highly recommend this residency to all the artists out there!

Related Articles

 Read about my artist profile on their webpage

Read my interview about my residency here!

Learn about the Patched Project Here!

Purchase my Patched Book -here!

Learn about the Women’s Studio Workshop Here!

Here is another great website to help you find the right artist residency for you! https://resartis.org/covid-19-updates/

Read about my artist residency at the Vermont Studio Center!

Connect with me on social media by clicking on one of the icons below!

Trusting Your Gut Feeling


Trusting your gut feeling when it comes to making art can be difficult. I get that you don’t have time and there are other things on your to-do list. As an artist trusting your gut is an important step in the art making process. Without following your intuition you might not be making enough art or the best art. You have to trust your gut and listen to your art intuition. 


If your art intuition is telling you to try something to add a different colour, to try a new technique, to make something- you should follow that. Just like any other form of intuition like a red flag warning sign in a bad relationship your art intuition usually isn’t wrong. If the art you are making looks off or doesn’t feel right make sure you are trusting your gut feeling. 


For awhile and I mean awhile, I have struggled with finding time to paint and make art. When I was living in Montreal doing my MFA it was easy because I had multiple studio spaces and designated time to make art. I was only working part-time and my main job was being a great art student.


Fast forward a few years, I had a mountain of student loans and was working multiple jobs to pay off the debt quickly. I didn’t have time to make art and was feeling tired, frustrated and unhappy.


Now, my student loans are paid and although I am teaching full-time I have been making more art. 


THIS IS A RECENT CHANGE...

Trust your gut when you are playing with new materials like this clay!

Trust your gut when you are playing with new materials like this clay!


I started to make art a priority and stopped saying, “I’ll make art when I have time.” Or, “When I have finished my to-do list.” 


I have realized that if you don’t make time for your priorities or what you value most that you won’t magically gain more time later.


There might not ever be a great time to do something.


I’ve made it my goal to make art everyday. Even if it’s something small or just for 10 minutes. I have been doing this for two weeks now and recording the days that I have made art and how I feel versus the days that I haven’t.


I have seen a HUGE difference in how I feel! I have more energy in my day because I have prioritized doing something that makes me happy and provides stress relief. 


I encourage you to do the same. Start making time for you and what you enjoy most! 

How to Trust Your Gut as an artist. Desktop of supplies to organize yourself as an artist


How Trusting Your Gut Feeling in Art Can Be Helpful

  • You will make better art 

  • You will be making art you are passionate about and not listening to other outside forces like society, family, or the art world pressure

  • You will feel happier and more proud of your art

  • You will want to make art more and naturally feel like you have more time to make it 

  • You will feel in align that you are doing what is right

  • You will feel more confident in your art and naturally in yourself


Desk space to organize yourself as an artist to trust your gut

How to Trust Your Gut in Your Art

  • Start making it a habit - part of a morning or evening ritual to make art 

  • Schedule a time to make art daily/weekly

  • Record in a journal how making art makes you feel and on days when you don’t make art how you feel 

  • Try rewarding yourself to establish your art making goals

  • Lay out your art supplies so they are visible and ready to be used

  • Write art goals and give yourself deadlines for what you are making

  • Set reminders/alarms on your phone for when to make art 

  • Remove distractions that might prevent you from making art like leaving your phone in another room or putting it on airplane mode


Trust your gut in design choices like flower arranging this vase

Once you start making art consistently by blocking out time to make art you will be trusting your gut feeling while you are making art.

Part of my goals that I made in January were related to wanting to make more art.


Here are the goals I made in January-let’s review them and see how I did: 

I have written in italics how I have been doing on these goals in the last 6 months.


Post consistently to social media (5x a week to instagram, 1-2x to facebook, every day to Pinterest, twice a month to my email list, blog post 3-4x a month, YouTube 2x a month)


I have posted consistently to instagram usually about 4-5x a week, I have done 2-3 posts on Facebook per week, emailed my list 2x a month and YouTube. I have been blogging 4x a month. 

Apply to art calls twice a month - I want to have more exhibitions this year!

I have been applying to 2-4 exhibitions or art calls a month. I have gotten a couple of new art exhibitions and grants this year!

Spend time in nature for inspiration- I find this really helps with my art practice.

I try to walk every day and plan a hike on the weekend. Although this doesn’t always happen I feel a lot better when it does. 

Make consistent art sales- I would love my art to be my main source of income.

Artist hands covered in clay. Artist tips by Jackie Partridge on trusting your gut with new art techniques

I started a Teachers Pay Teachers store a couple of months ago to help add consistent art income. I am continuing to grow my business.

Keep my website updated monthly- I like reviewing my website at the end of each month to make sure everything is current.

I usually update my website every couple of months and I know I can get better at this.

Set boundaries for teaching for more work life balance- no work on Friday nights and Saturdays, no emails past 7pm, no marking on the weekend.

I have done really well with this goal which has helped me to have more time to make art.

Make art during school breaks- Teaching full time has made me really miss having time to make my art.  

I have been doing this and recently started to make art everyday even if it is something small like a quick sketch or taking a photo.

Related Articles You Might Love:

You can read more about the 6 tips for achieving your goals here!

How to stay motivated as an artist

You might enjoy adding freshness to a stale art practice

Biggest secret for a struggling artist

Trusting your gut feeling will really make a difference with your art and in your life. I have found that when I make art more often I feel happier and when I am listening to my intuition and making the art I want to make I am also happier.

Connect with me on social media by clicking on one of the icons below:


Join my mailing list where you can receive more great tips!

Fall YouTube Painting Video Recap!

Check out my acrylic painting YouTube channel >>Jackie Partridge Art<< Here is a list of YouTube videos that were posted to my channel over the last couple months as a little recap. In case you might’ve missed some of my acrylic painting tutorials! There are some great pumpkin painting tutorials and even a pumpkin painting kids tutorial!

You can read the descriptions of the videos before clicking the link to see the video.

You can watch these videos for free at anytime. If you have a YouTube account you can click the clock in the top right corner of the video to save it to your “Watch List” to watch it for later.

Be sure to subscribe to my channel —you can click the bell beside the subscribe button on YouTube to receive notifications of when new videos are added! - I release NEW videos every month!

If you like a video be sure to hit the “thumbs up” to like it or share it with a friend!

Let’s take a look at the videos for this month!

Posca Pen Zentangle

Learn the relaxing art of zentangle and unwind learning about this technique to incorporate into your acrylic paintings. This short tutorial is simple enough for kids to try!

Watch Posca Pen Zentangle- HERE

Video Length: 11 min. 33 sec.

9 different brushstrokes with acrylic paint example by Jackie Partridge

9 Different Brushstrokes for Beginners

I will teach you nine different brushstrokes that you can use to elevate your acrylic paintings. This tutorial is short and easy for beginner painters to try or even kids!

Watch 9 Different Brushstrokes for Beginners-HERE

Video Length: 11 min 52 sec.

Pumpkin acrylic painting for kids or beginners! Perfect art lesson for kids!

Pumpkin acrylic painting for kids or beginners! Perfect art lesson for kids!

Paint a Pumpkin

This is a perfect full painting tutorial for beginners or kids age 7 and up! Learn how to paint a pumpkin complete with a spider and spider’s web. Learn about colour mixing, painting shadows and highlights and more!

Watch Paint a Pumpkin- HERE

Video Length: 16 min. and 11 sec.

Abstract Pumpkin Painting -painted with a palette knife by Jackie Partridge

Paint an Abstract Pumpkin

In this video learn how to create texture in your acrylic painting using a brush and palette knife. Paint an abstract pumpkin perfect for some fall decor in your home. The perfect Thanksgiving or Halloween art project. Learn about mixing green, orange and grey as well as how to choose the perfect background colour.

Watch Abstract Pumpkin Painting-HERE

Video Length: 25 min. and 32 sec.

If you would like to improve your acrylic painting - sign up to receive my FREE painting guide where I share 10 tips to improve your acrylic painting and the 10 common mistakes beginner painters make and how you can avoid them!


Click one of the icons below to connect with me on social media!

Paper Making with Recycled Blue Jeans

Paper making with recycled blue jeans is a time consuming process but it also a rewarding process. I love being sustainable in my art practice and using recycled blue jeans to make paper is exciting! I will show you how to make paper with recycled blue jeans in this post! I started paper making in 2015, where I was working as a teaching assistant in a paper making class during my MFA. See some behind the scenes about the process of paper making below!

How to Make Paper Out of Recycled Blue Jeans -What You Need

  • a hollander beater

  • water

  • a vat (plastic tub that is shallow)

  • mould and deckle

  • felts

  • sponge

  • jeans that are 100% cotton (they must be 100%)

  • Check out this article for other paper making supplies you need!

How to make paper out of jeans, denim pulp by Jackie Partridge

The Process for Making Paper out of Recycled Denim

Denim Doily -Medium
CA$90.00
Add To Cart

You can make paper with found denim as long as the fibres are 100% cotton. In order to make paper out of fabric the fibres need to be natural and not include synthetic fibres. Now a days it can be hard to find blue jeans like that!

Above is an image from the paper making process —> turning denim —> tiny strands of thread —> to pulp —> to paper


Steps for Paper Making with Recycled Blue Jeans:

In order to make the denim paper the blue jeans must be collected rinsed with water (this removes the laundry detergent so the pulp isn’t foamy) and cut into tiny 1cmx 1cm squares. I sort my denim by shade of blue jeans this will get you different blues in your paper. You will have to rinse the jeans in the washing machine with no detergent for a couple cycles to remove any soap residue. If you don’t properly wash the denim you will get lots of foam and bubbles when you run them through the hollander beater. After the squares are cut they are put into a beater that grinds the natural fibres into tiny blue threads.

After the pulp is beaten down to tiny threads (taking around 4 hours or longer). The longer you beat the denim pulp the less threads appear in the paper. The pulp is added into a vat of water and a mould and deckle are used to create sheets of paper. You will scoop the recycled blue jean denim pulp with a mould and deckle in the vat of water and pull a sheet. Then remove the top mould and press the screen on sheets of felt squeezing out excess water. You can also press down with a dry sponge. Layer a felt of the wet sheets of paper. Then place the stack of felts and blue jean paper in a press to squeeze out extra water. Remove sheets of paper and dry them by hanging or in a flat dryer. It will take over 24 hours to dry.

A handful of denim pulp

A handful of denim pulp

Here is abaca paper mixed with denim pulp in a mould and deckle (this forms the shape of the paper)

Here is abaca paper mixed with denim pulp in a mould and deckle (this forms the shape of the paper)

Leftover pulp dries and water can be added to make it pulp again!

Leftover pulp dries and water can be added to make it pulp again!

Denim Paper-Light and Dark Blue
CA$28.00
Shade of Blue:
Quantity:
Add To Cart